Domestic Pig Skull 3D Model
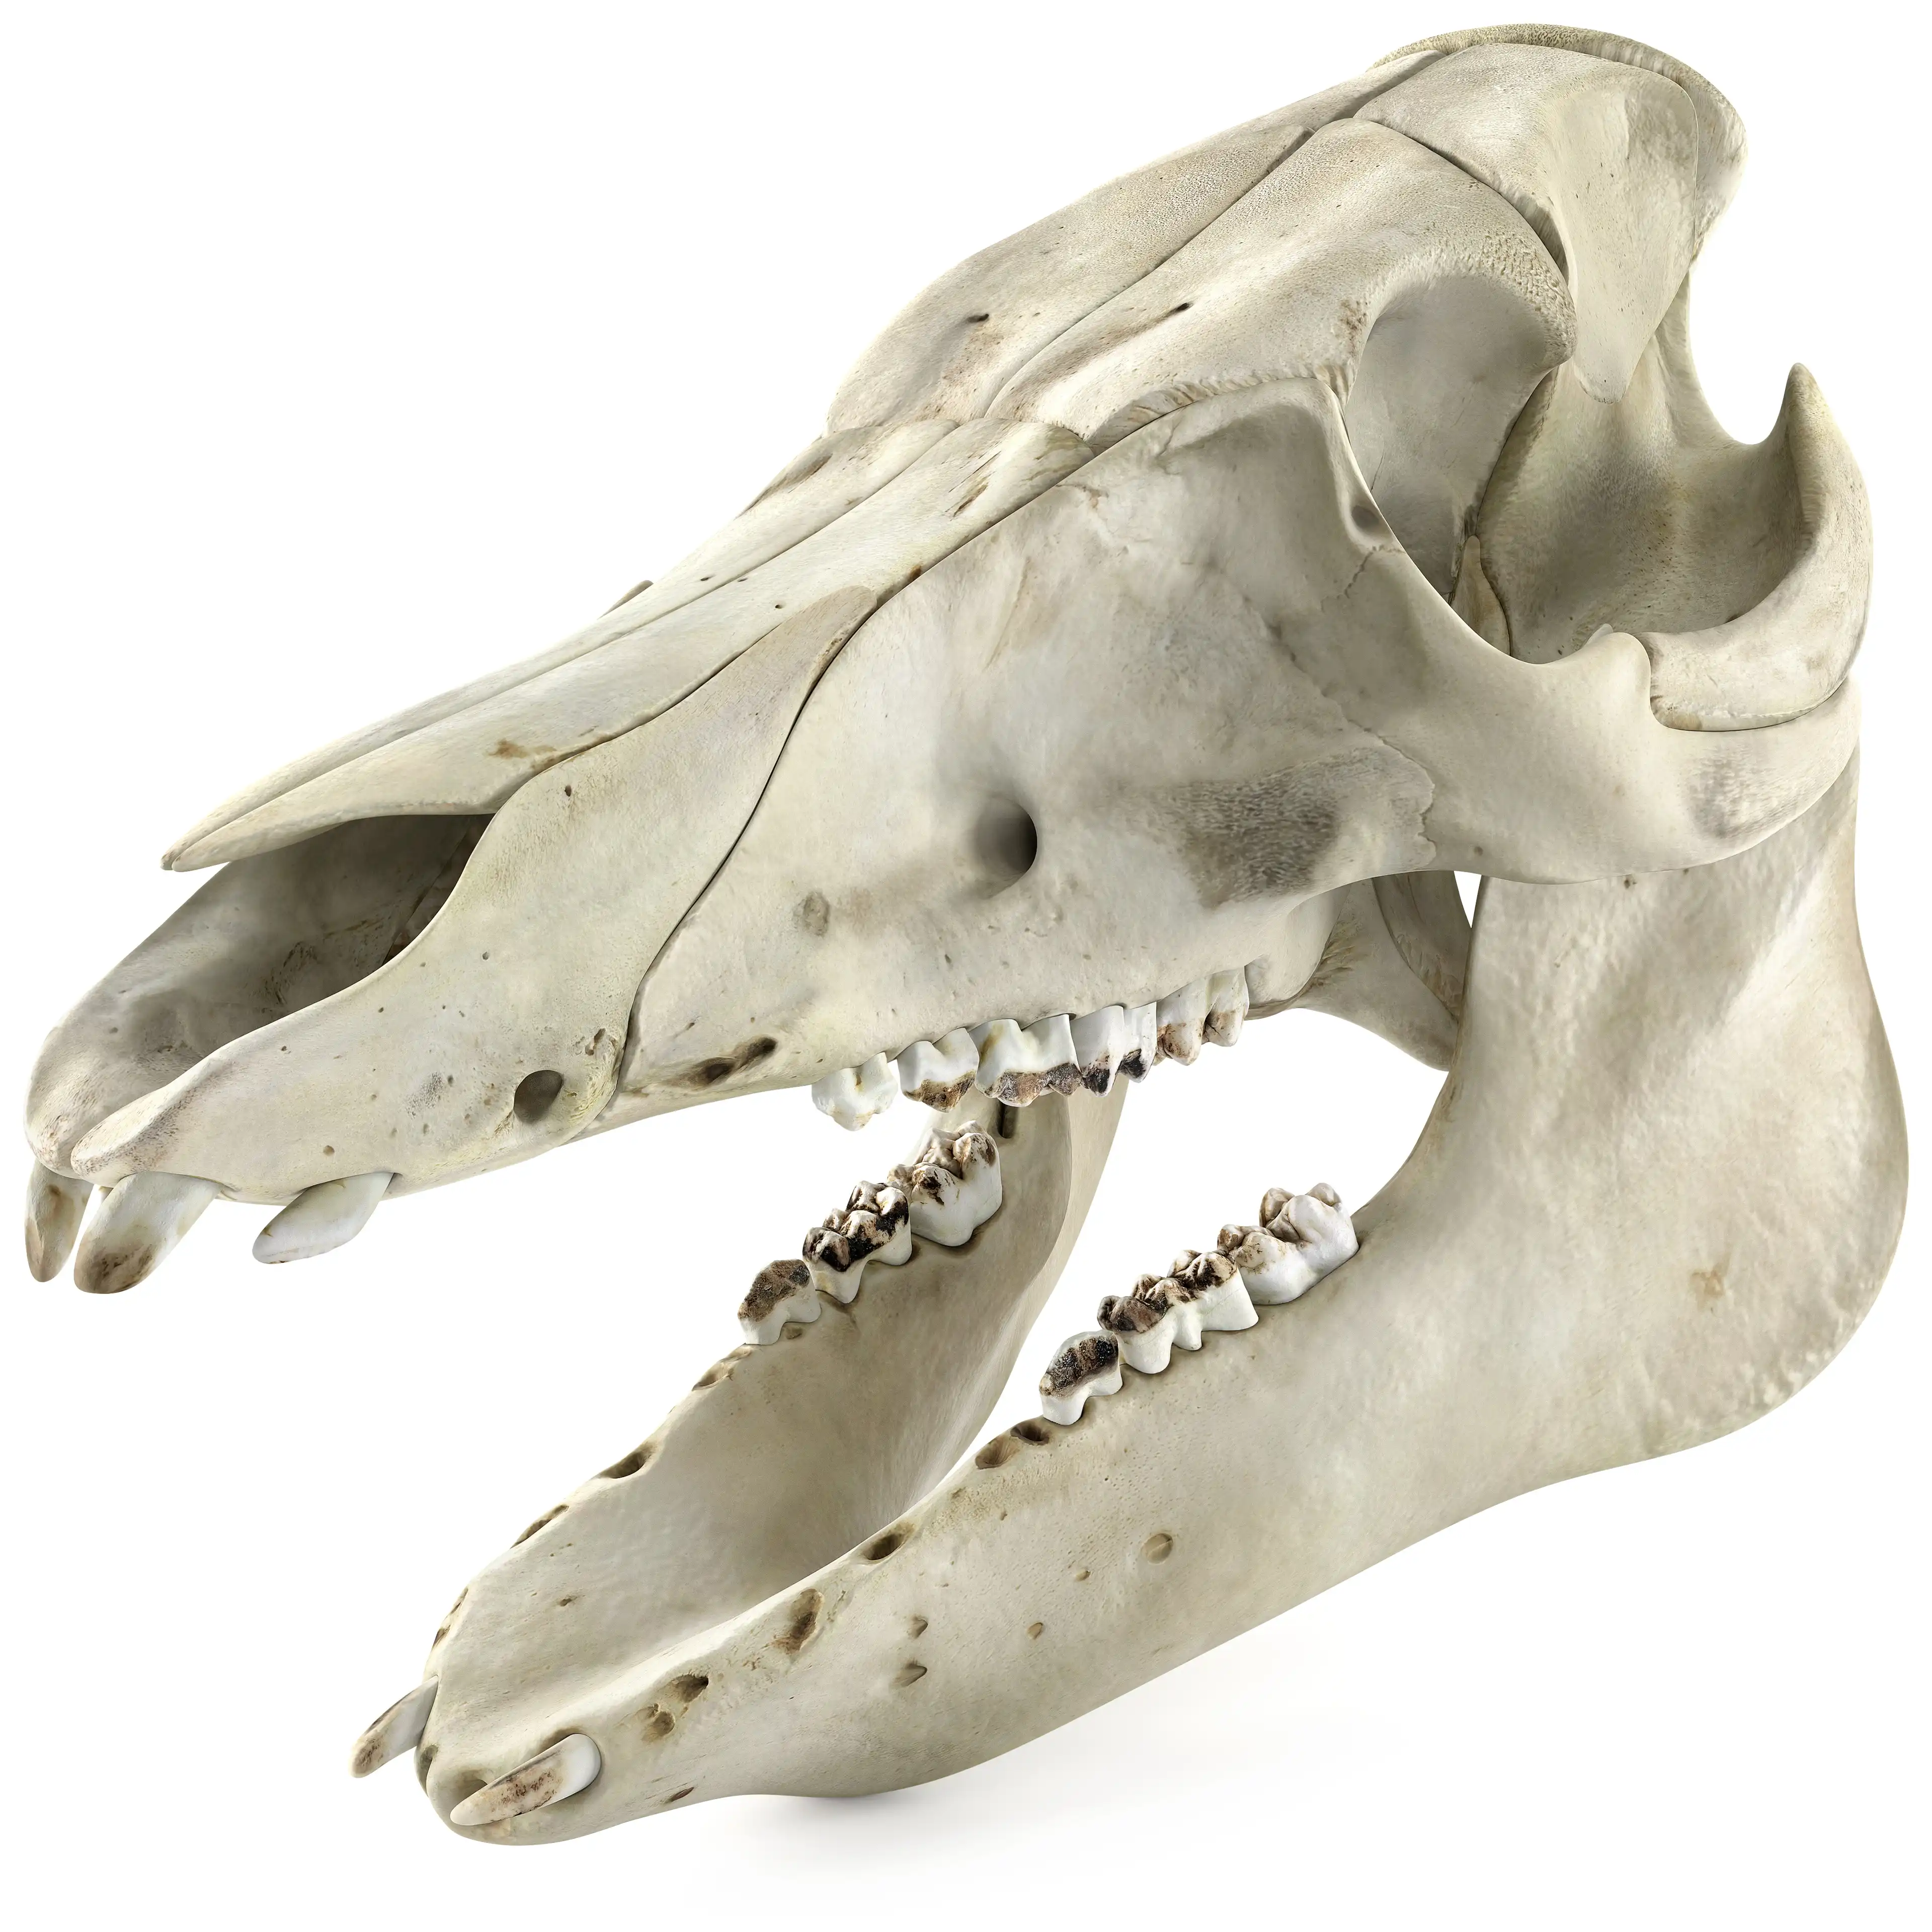
Photorealistic highly detailed scanned manually retopologized anatomically accurate 3D model of a medium-sized domestic pig skull. Low-poly subdivision surface ready topology. A unique 11 bones and 11 teeth including tooth roots, each as separate 3d object. All 3D models is UV Unwrapped. The UV islands are reasonably distributed between 5 PBR textures sets to achieve optimal texel density. Two native formats, 3ds Max V-Ray & Blender Cycles. Both are handcrafted for the best use experience. The asset is ready for ultra close-up shooting. Thanks to the low-polygonal base mesh, this 3D model can also be used as props for the game engine, including animation of breaking into pieces.
3D Asset Details
-
Anatomically accurate
-
All parts have appropriate anatomical names
-
Shapes and textures are scanned from real disassembled skull of a domestic pig
-
Real-world size of 24 x 16 x 13 cm
-
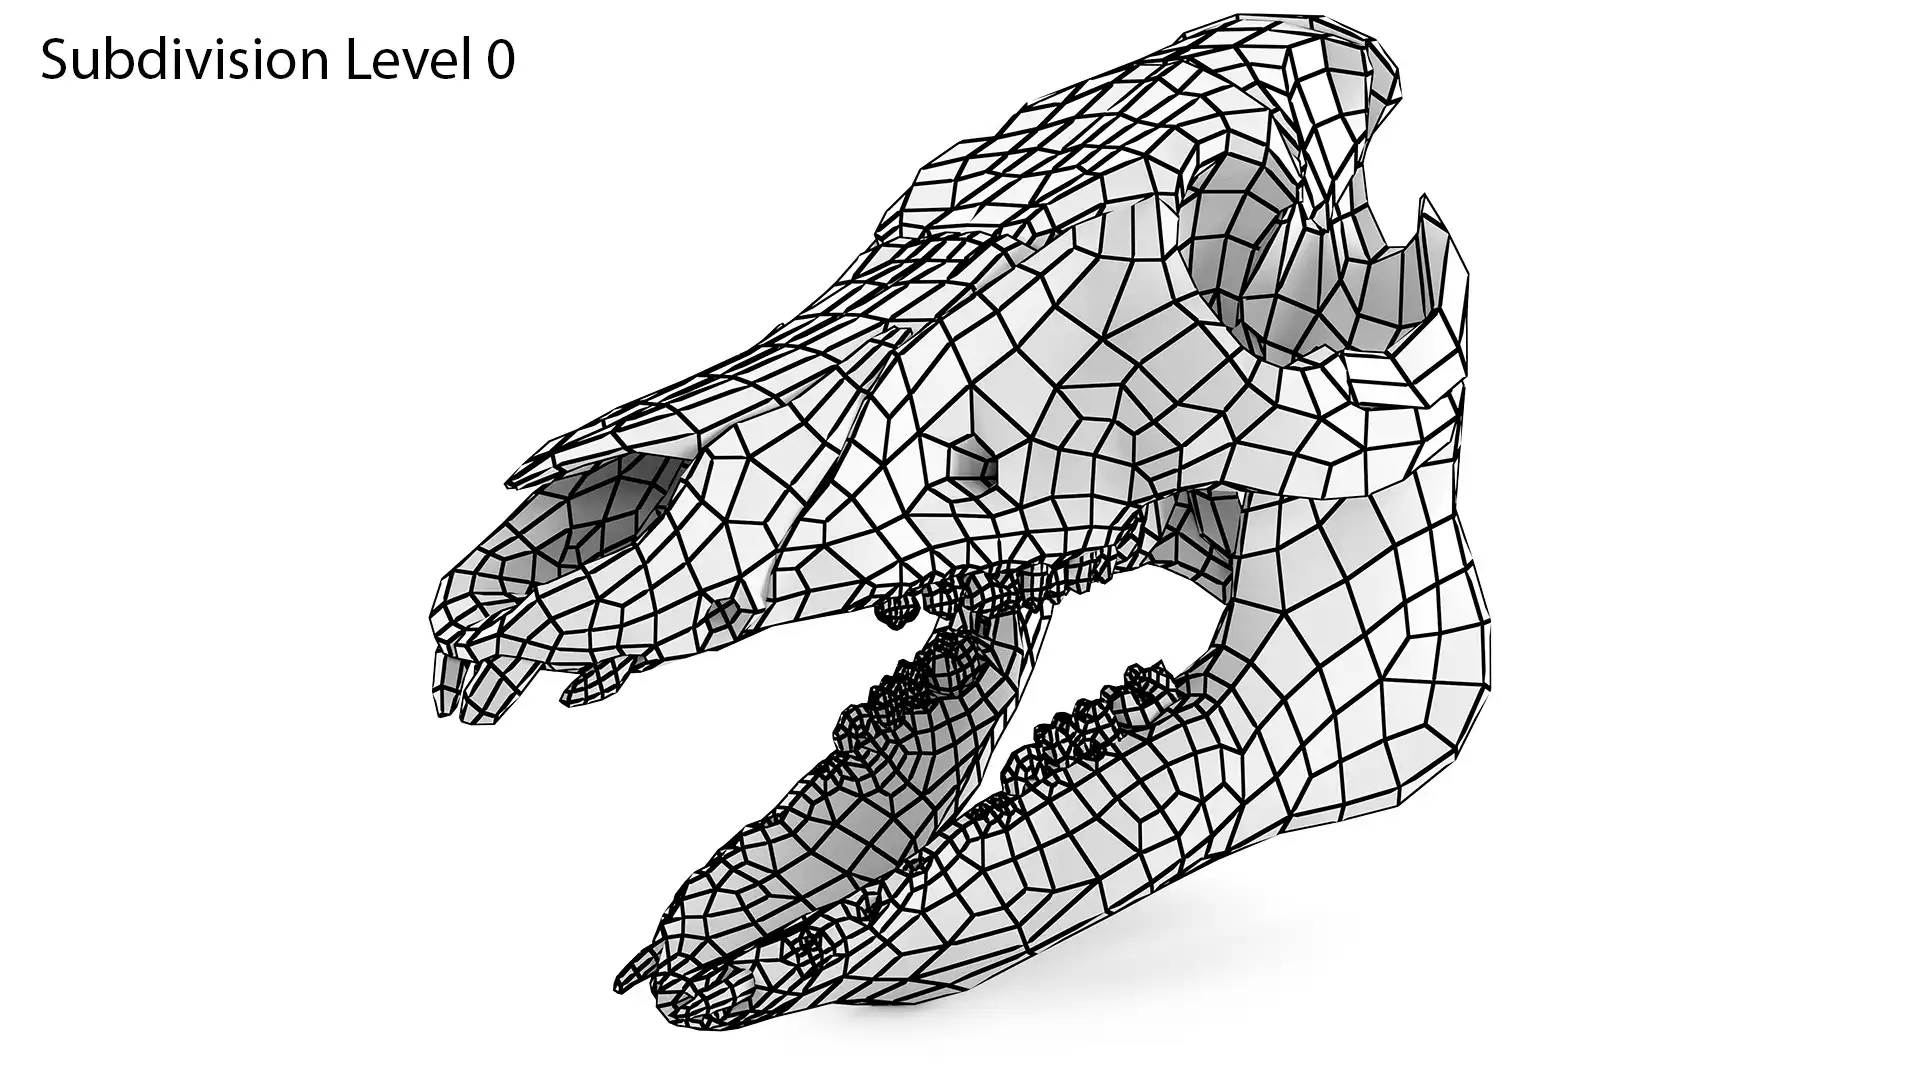
Handcrafted low-poly base mesh
-
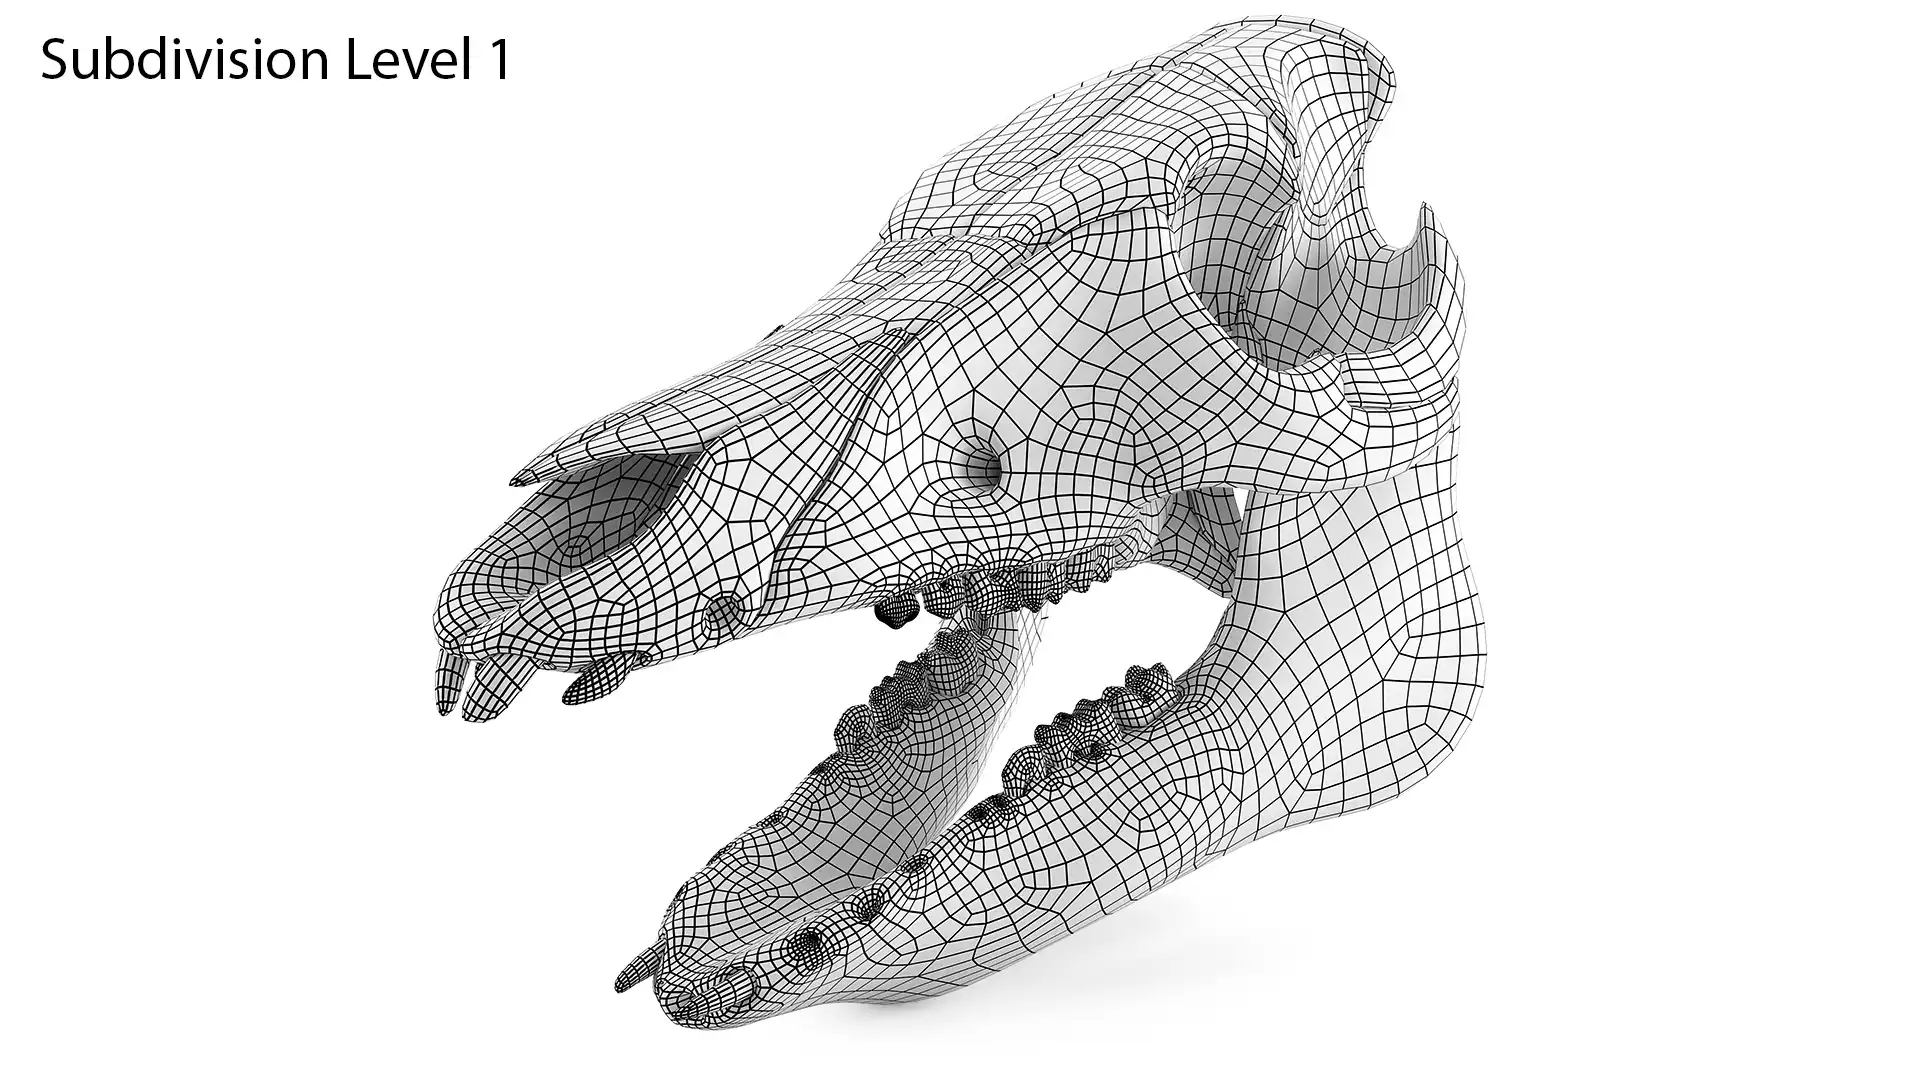
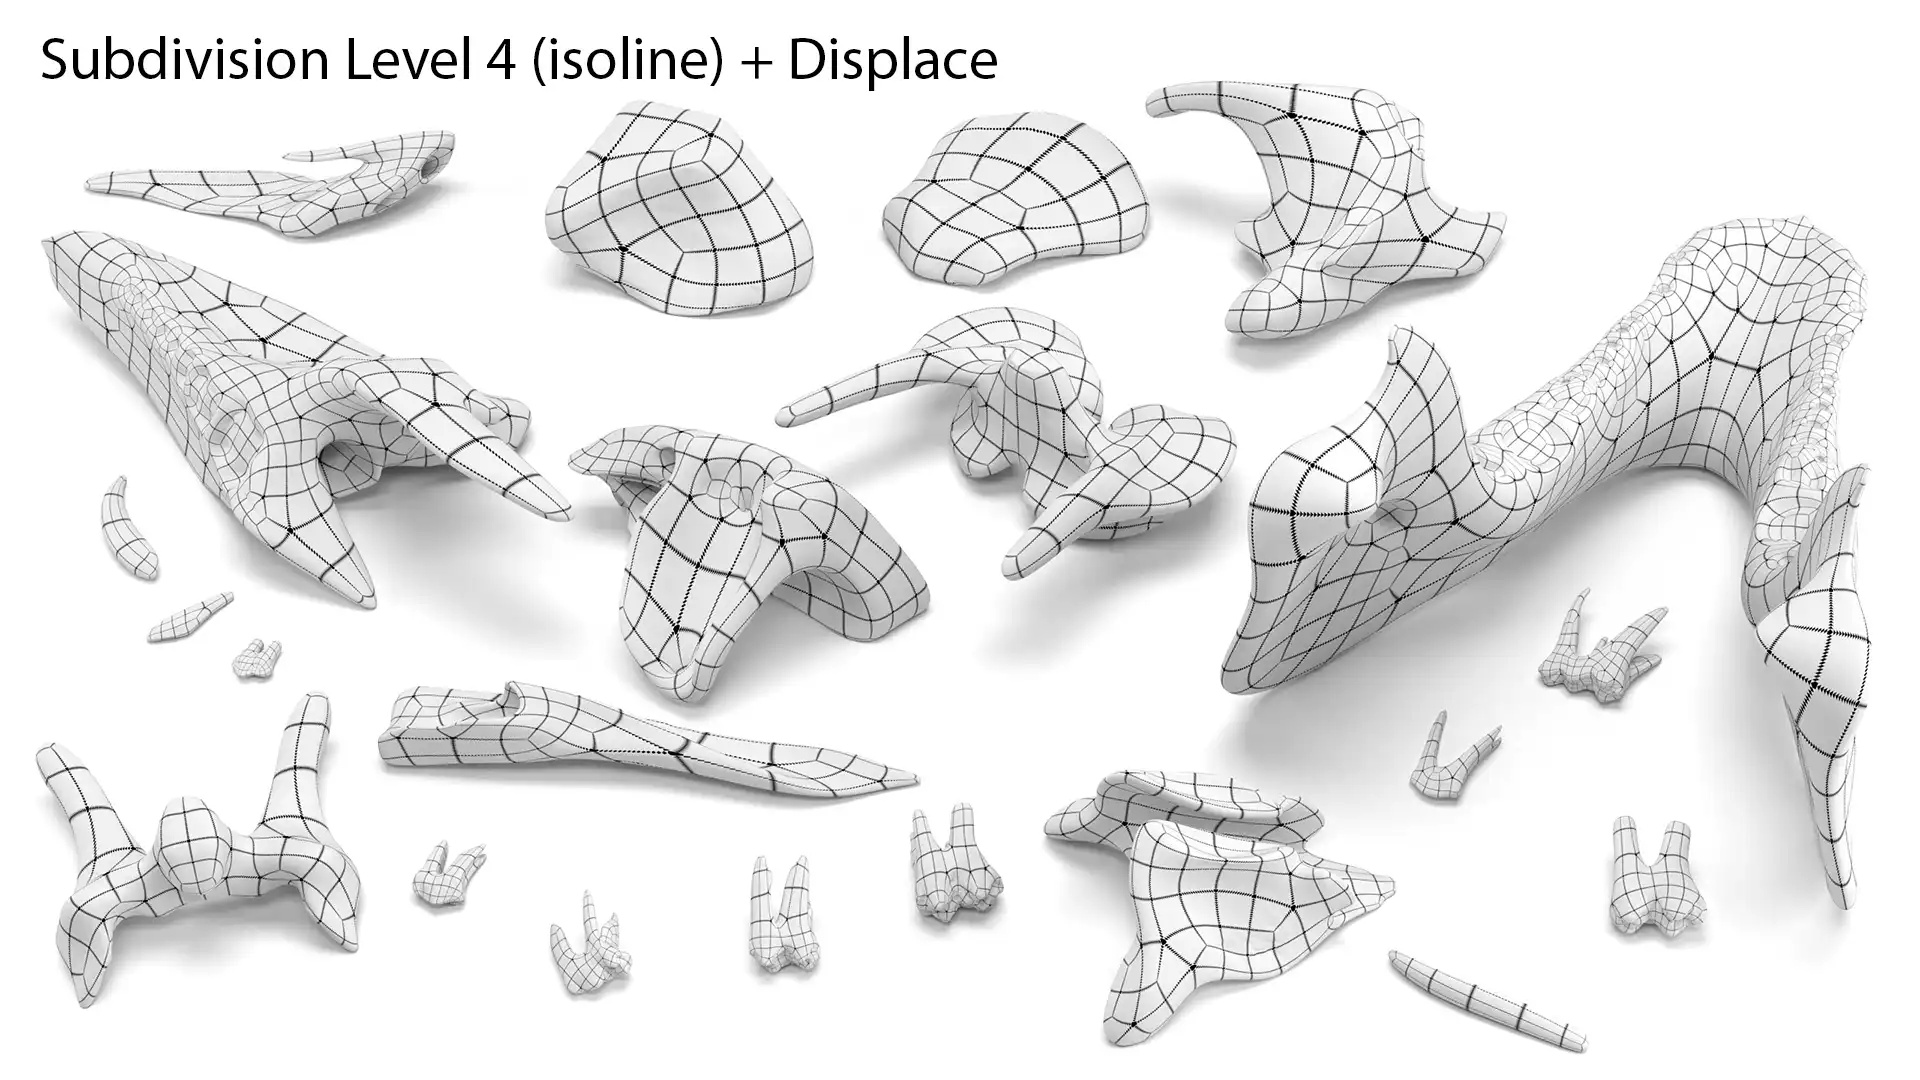
Subdivision surface ready topology
-
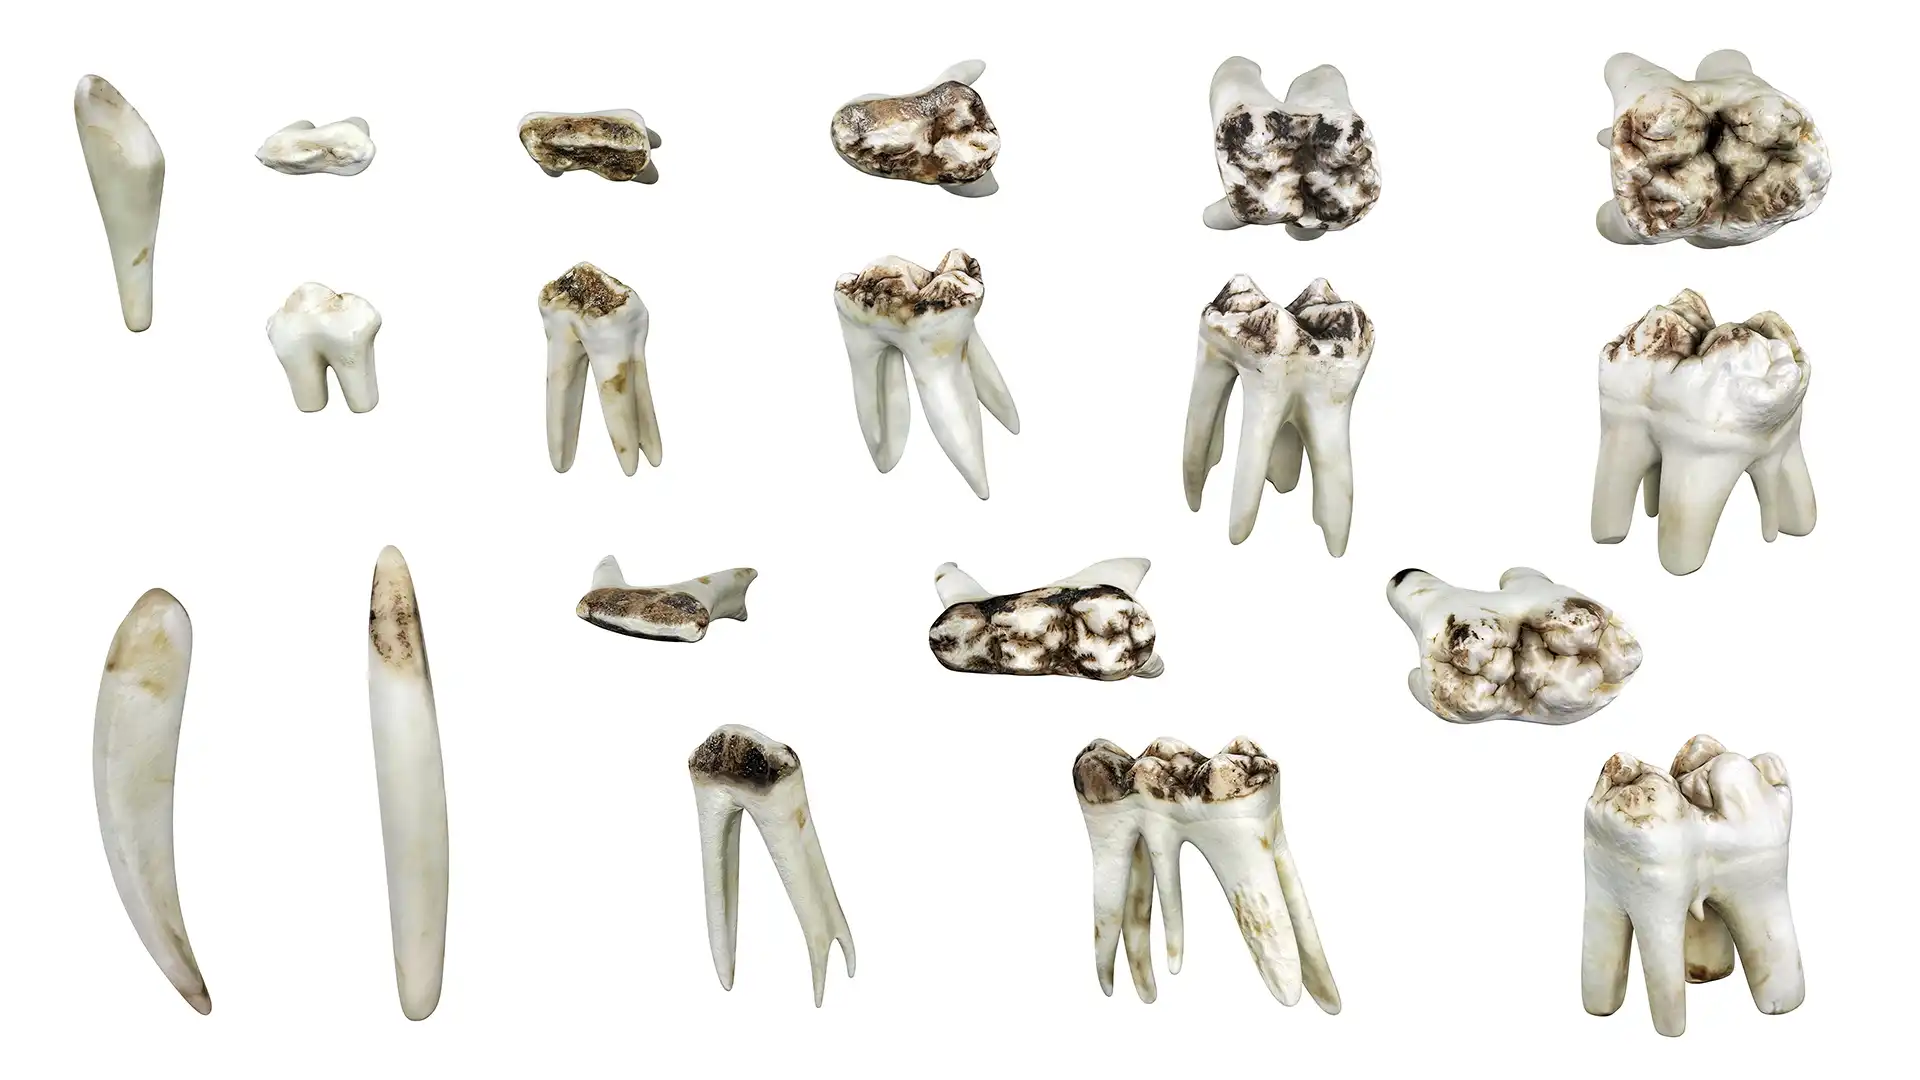
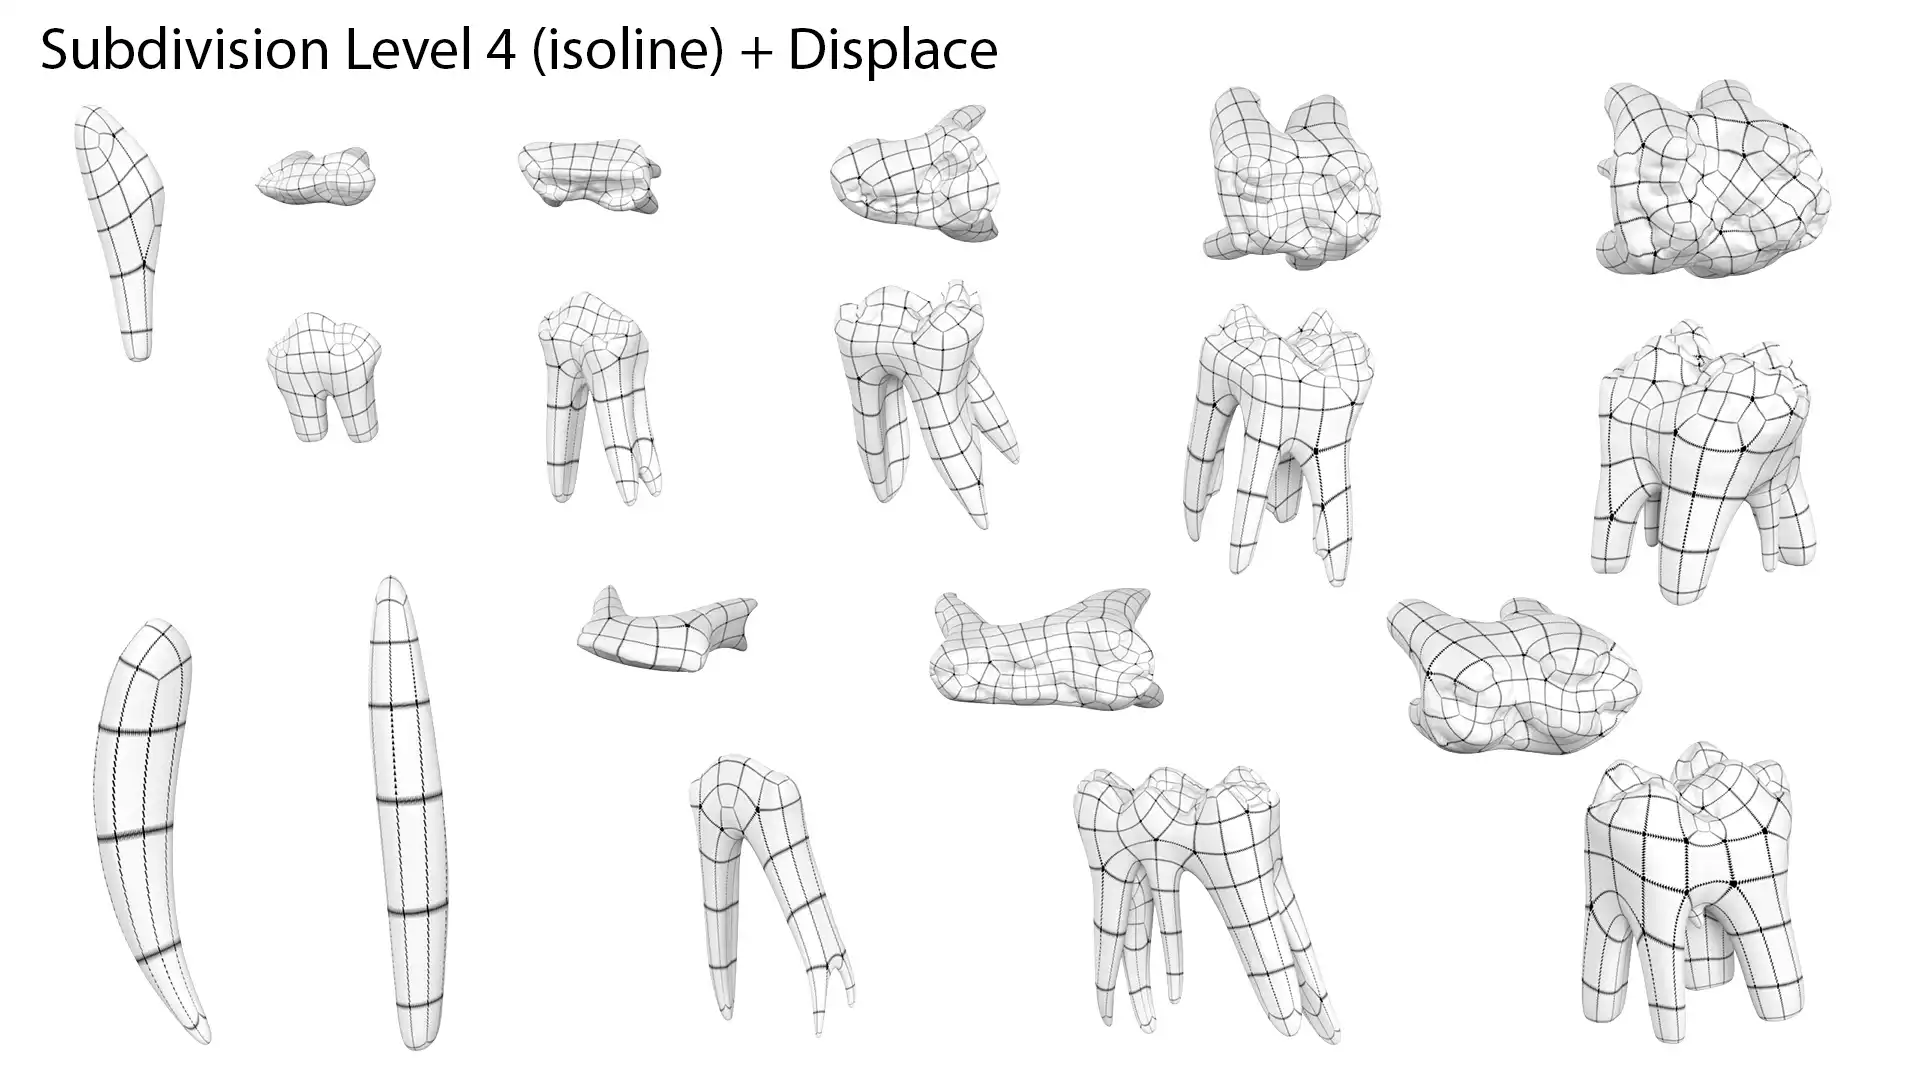
11 unique bones & 11 unique teeth as separate models
-
Two hand-made native formats, 3ds Max 2017 V-Ray 3.6 & Blender Cycles 2.92
-
UV islands reasonably distributed across 5 PBR textures sets
-
Easy to edit layouts, optimal texel density
-
8192x8192 maps for BaseColor / Diffuse
-
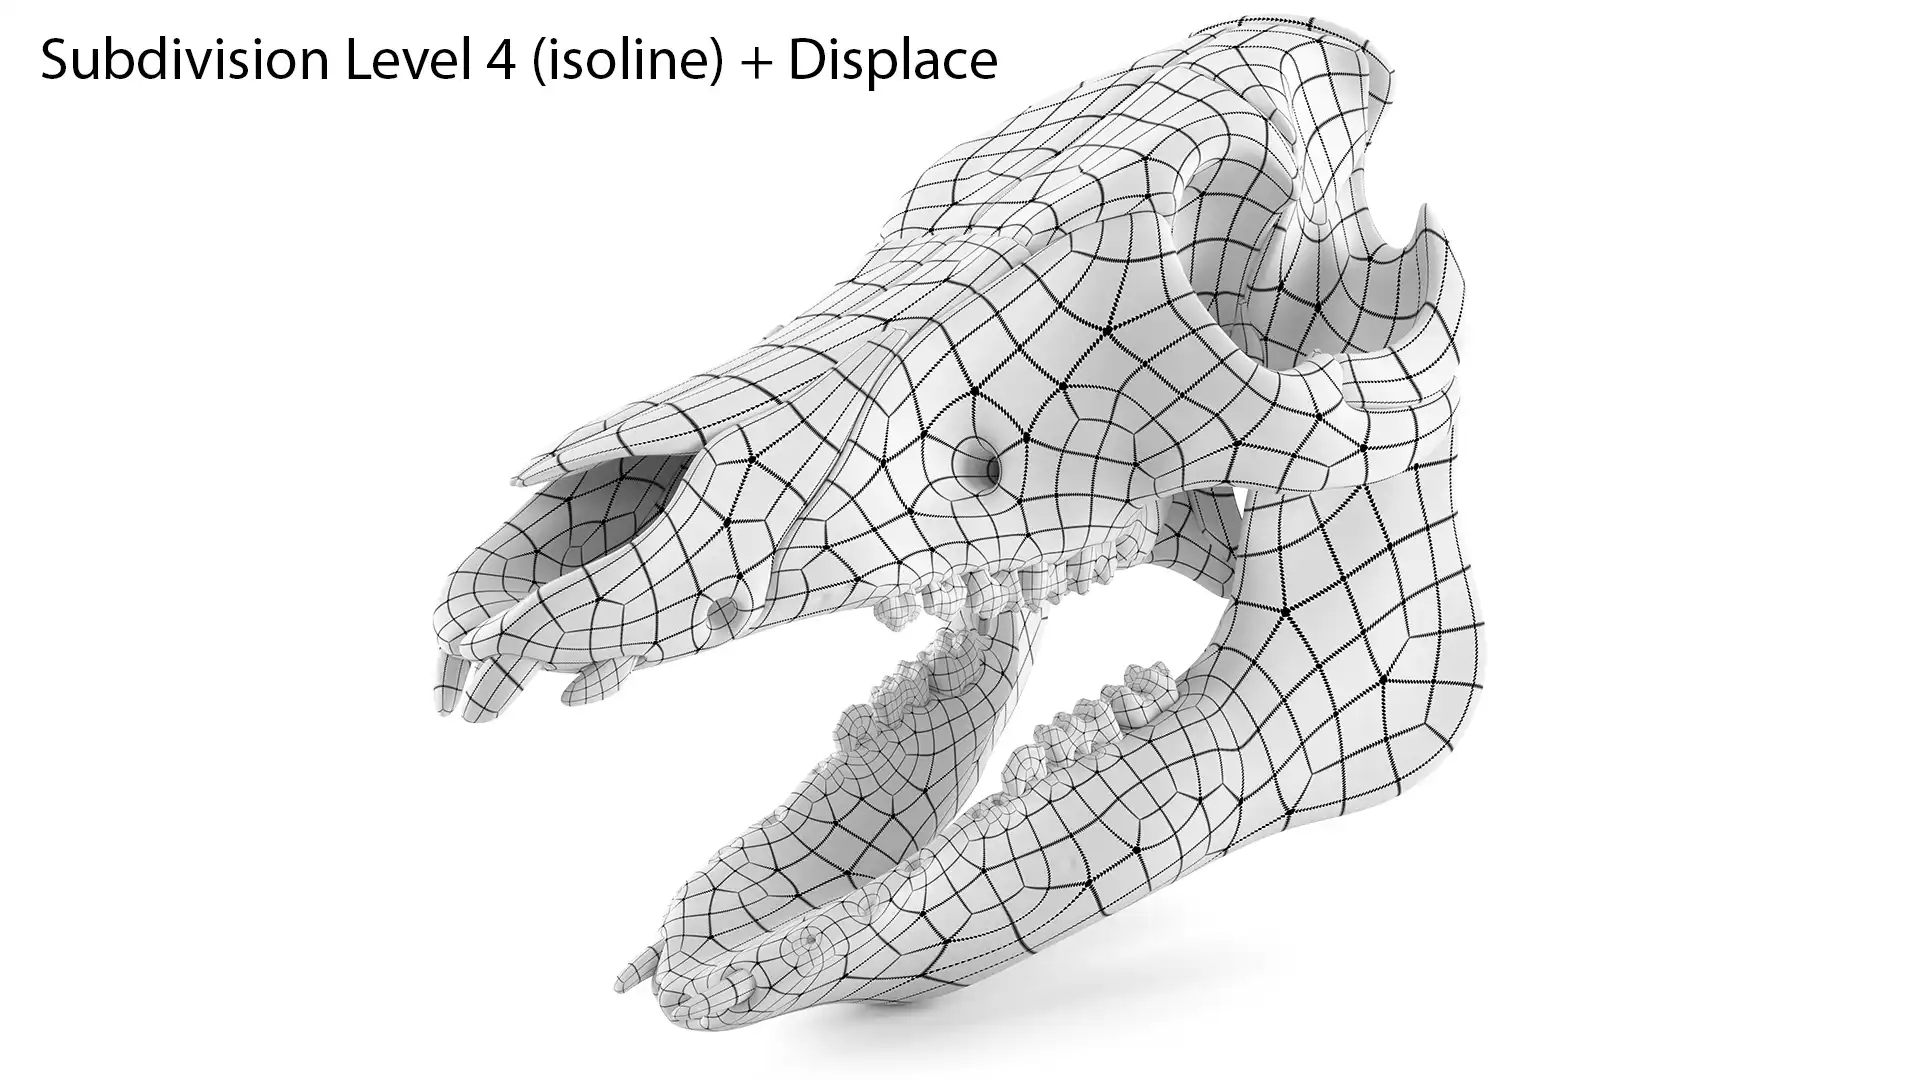
4096x4096 maps for *Normal, Displace
-
2048x2048 maps for BaseColor, Diffuse, Specular, Roughness, Glossiness, *Normal, Displace, **AO
-
Tis asset can help save weeks of tedious work
* - Normal maps are provided for both DirectX and OpenGL modes
** - AO maps is baked for skull in default pose (jaw closed)
Native Formats
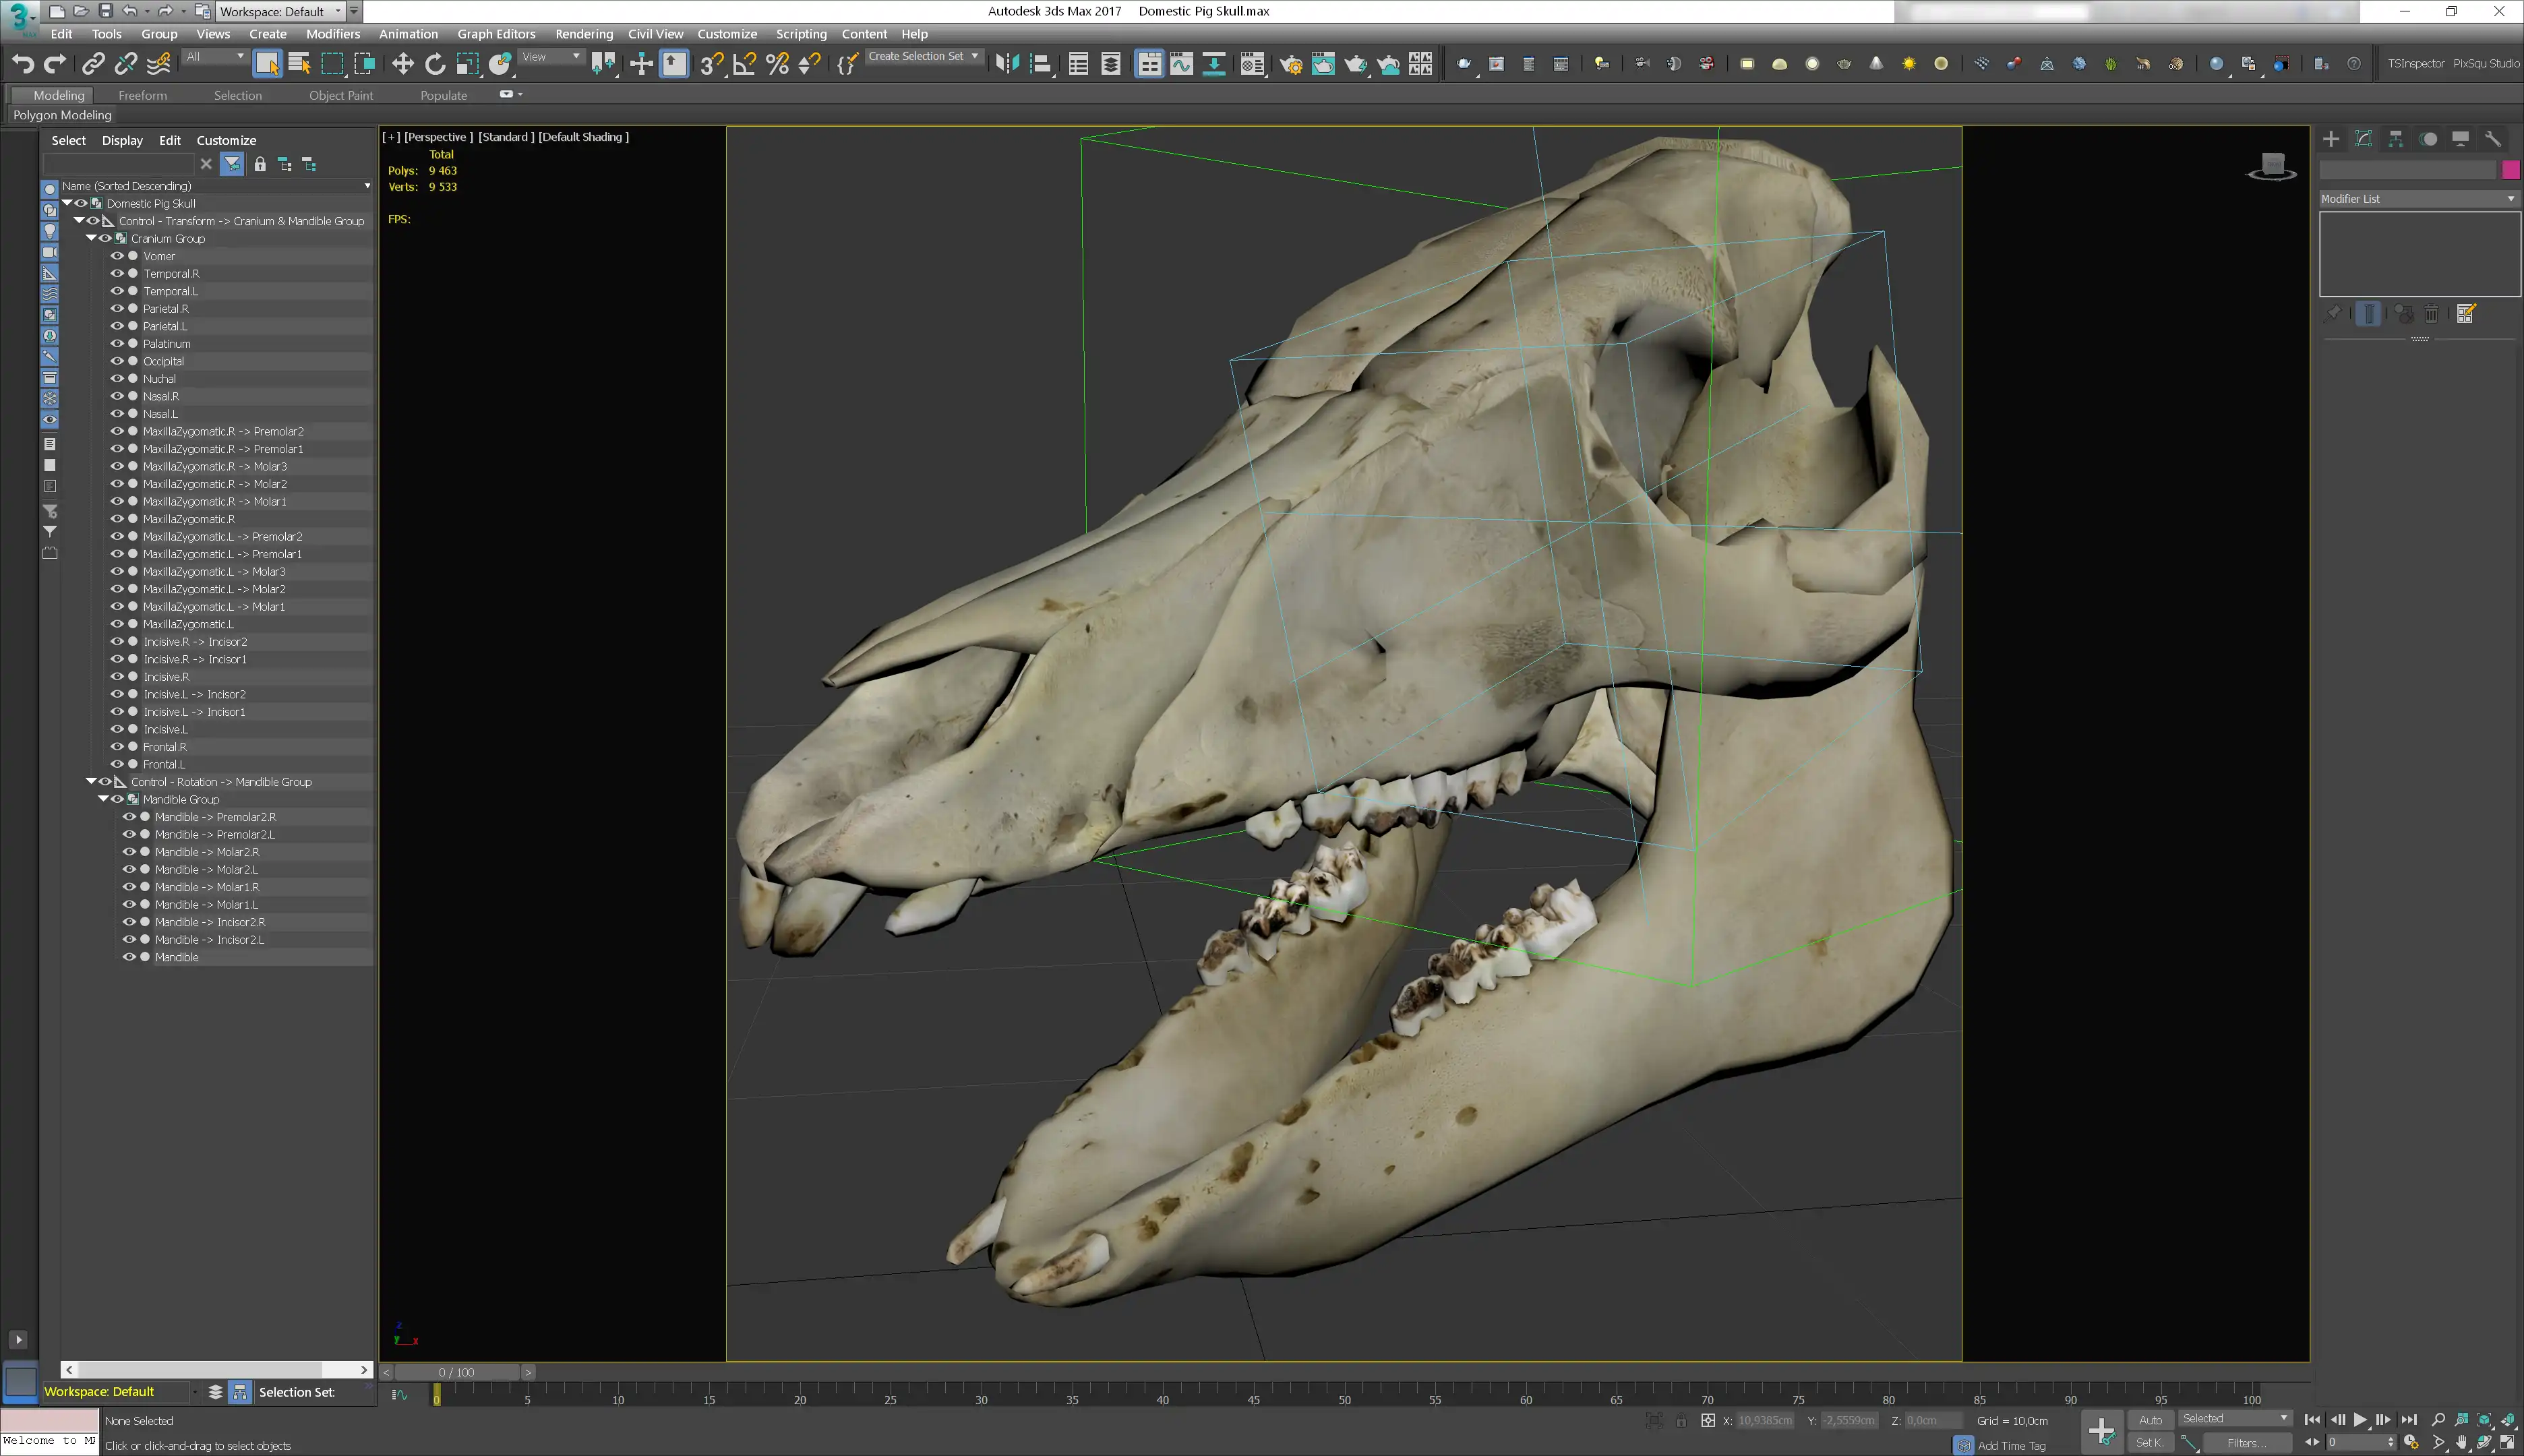
In 3ds Max format, specular workflow texture set is used. Material based on VRayMtl. The Displace modifier with appropriate map is applied.
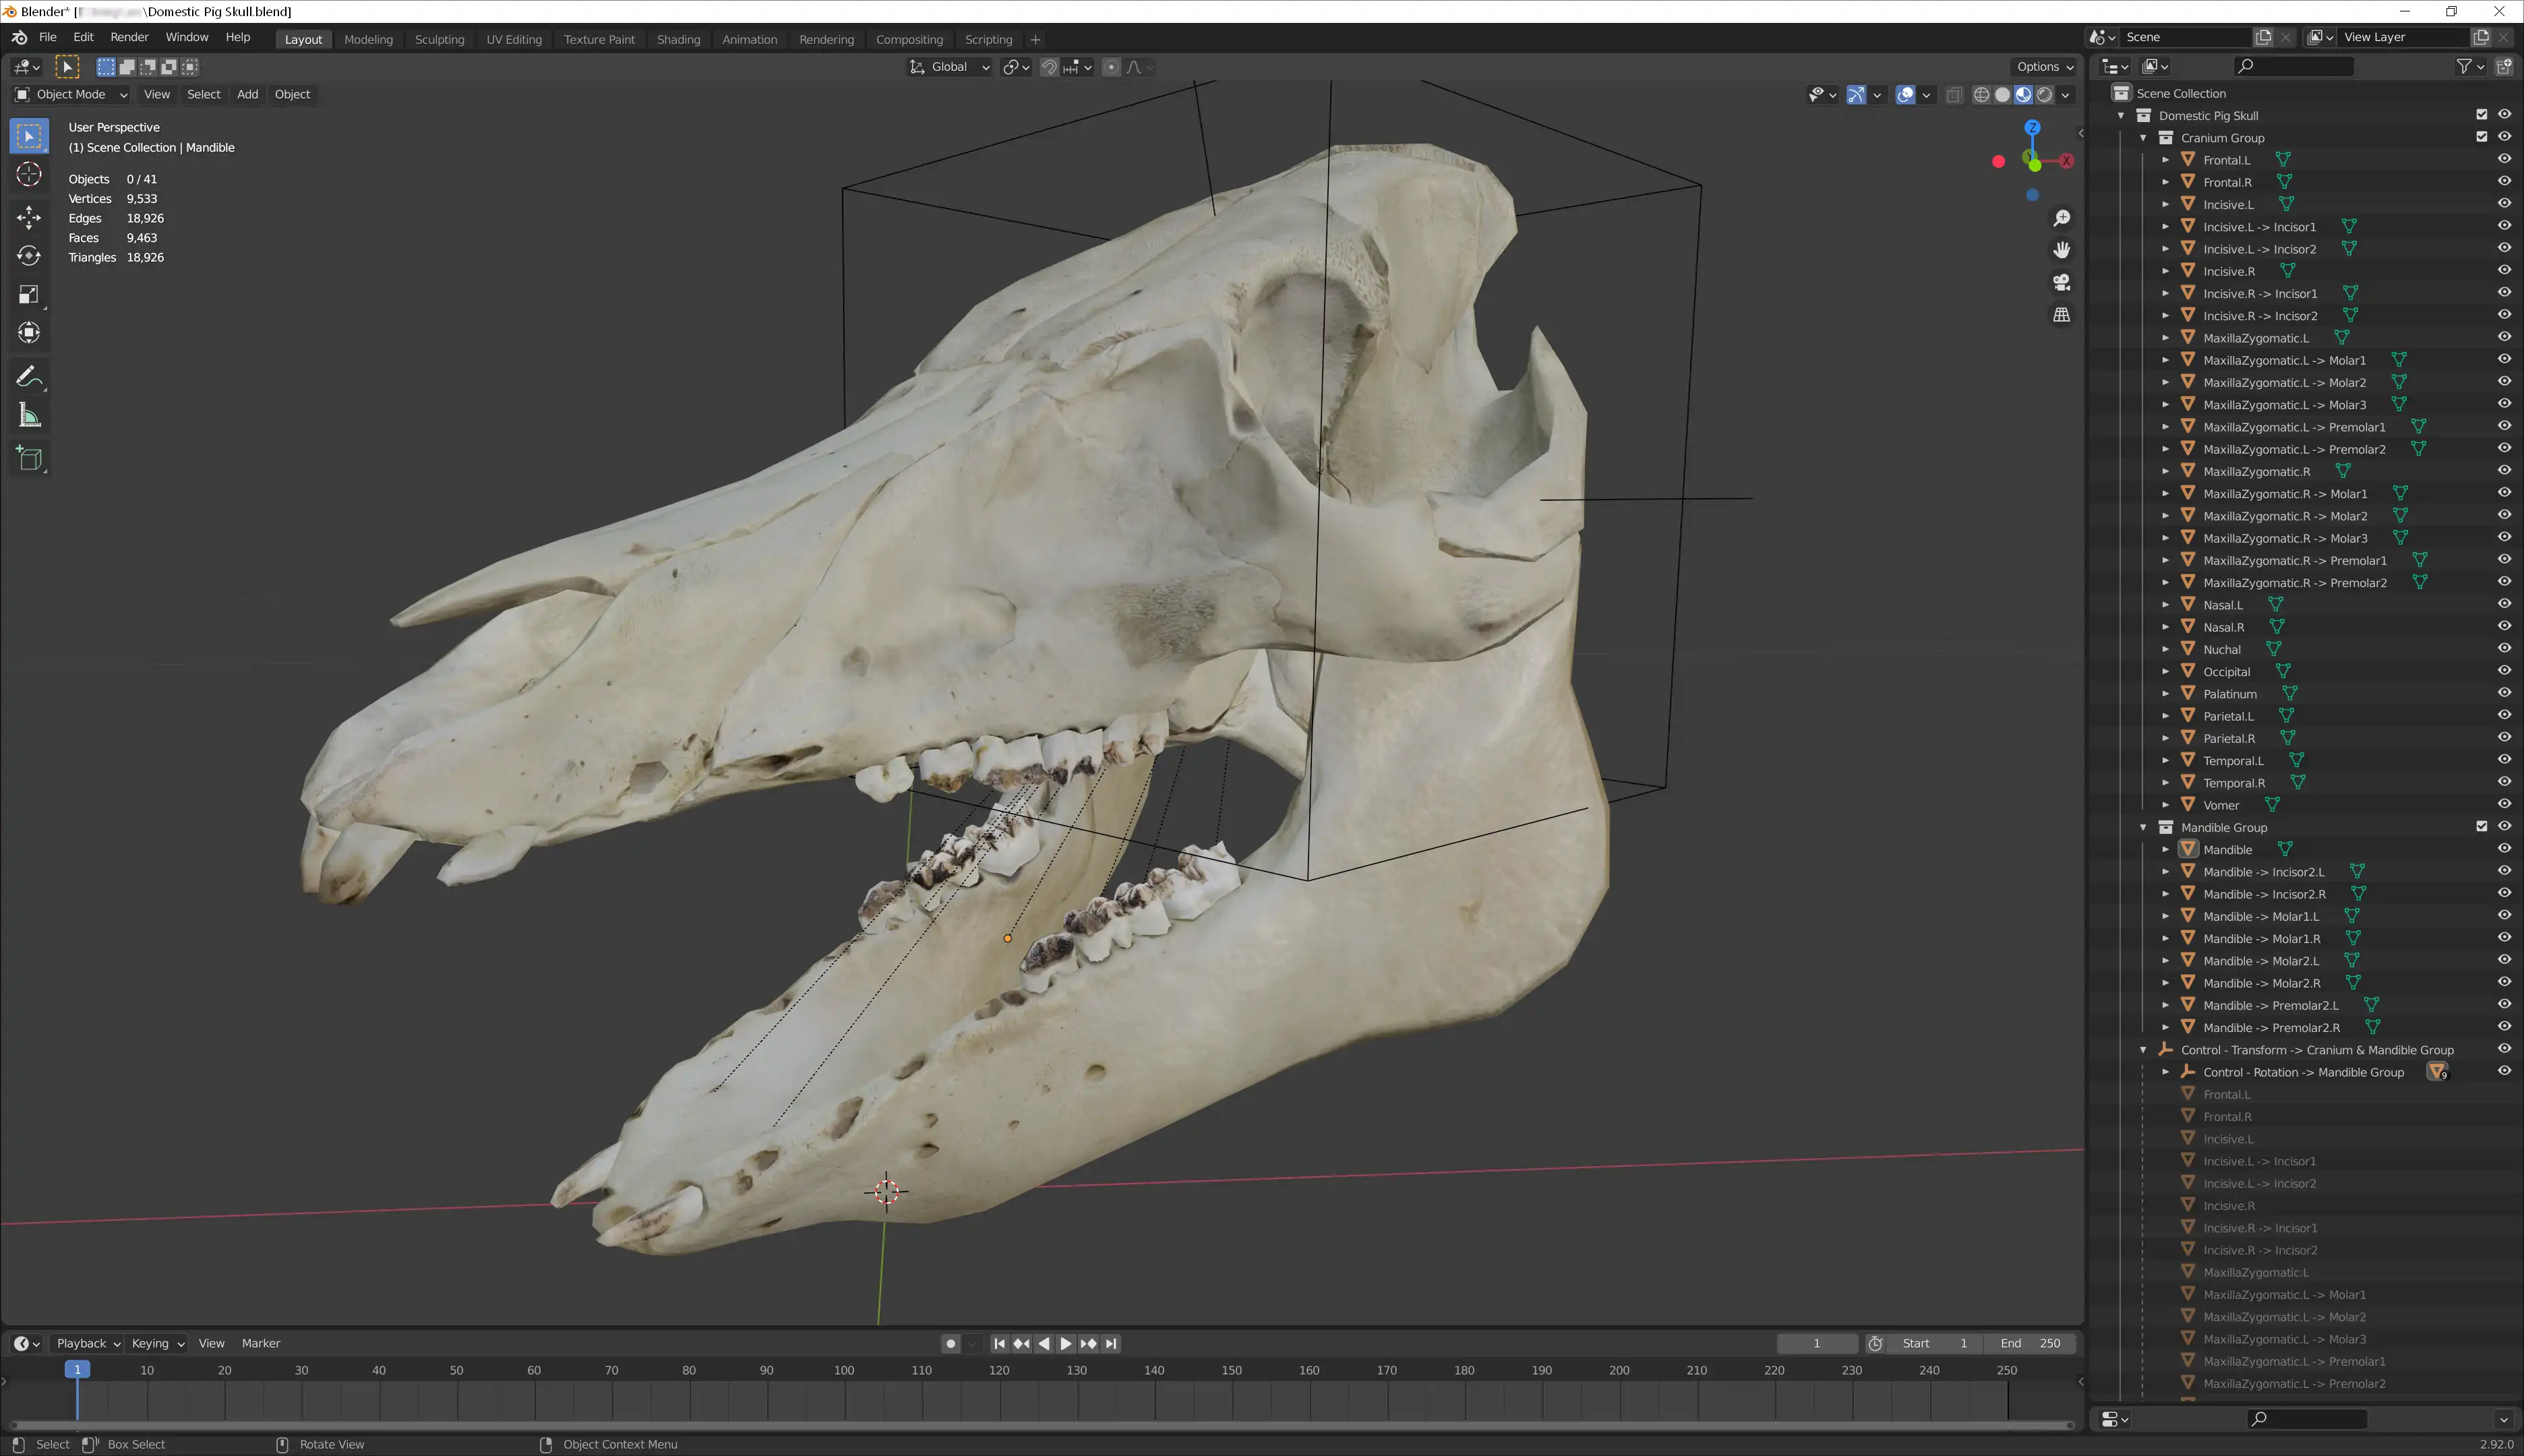
In Blender format, metallic-roughness workflow texture set is used. Material based on Principled BSDF. The Displacement is applied by material node as part of the shader.
Both formats have surface subdivision modifiers applied with 2 in-viewport iterations and 4 iterations for rendering. Either native formats additionally contain two parented/linked helpers. One is for the transformation of the whole skull, and the other is locked for the rotation of the jaw. The native format model is ready for photorealistic visualization out-of-the-box: no additional tweaks required.
Additional Info
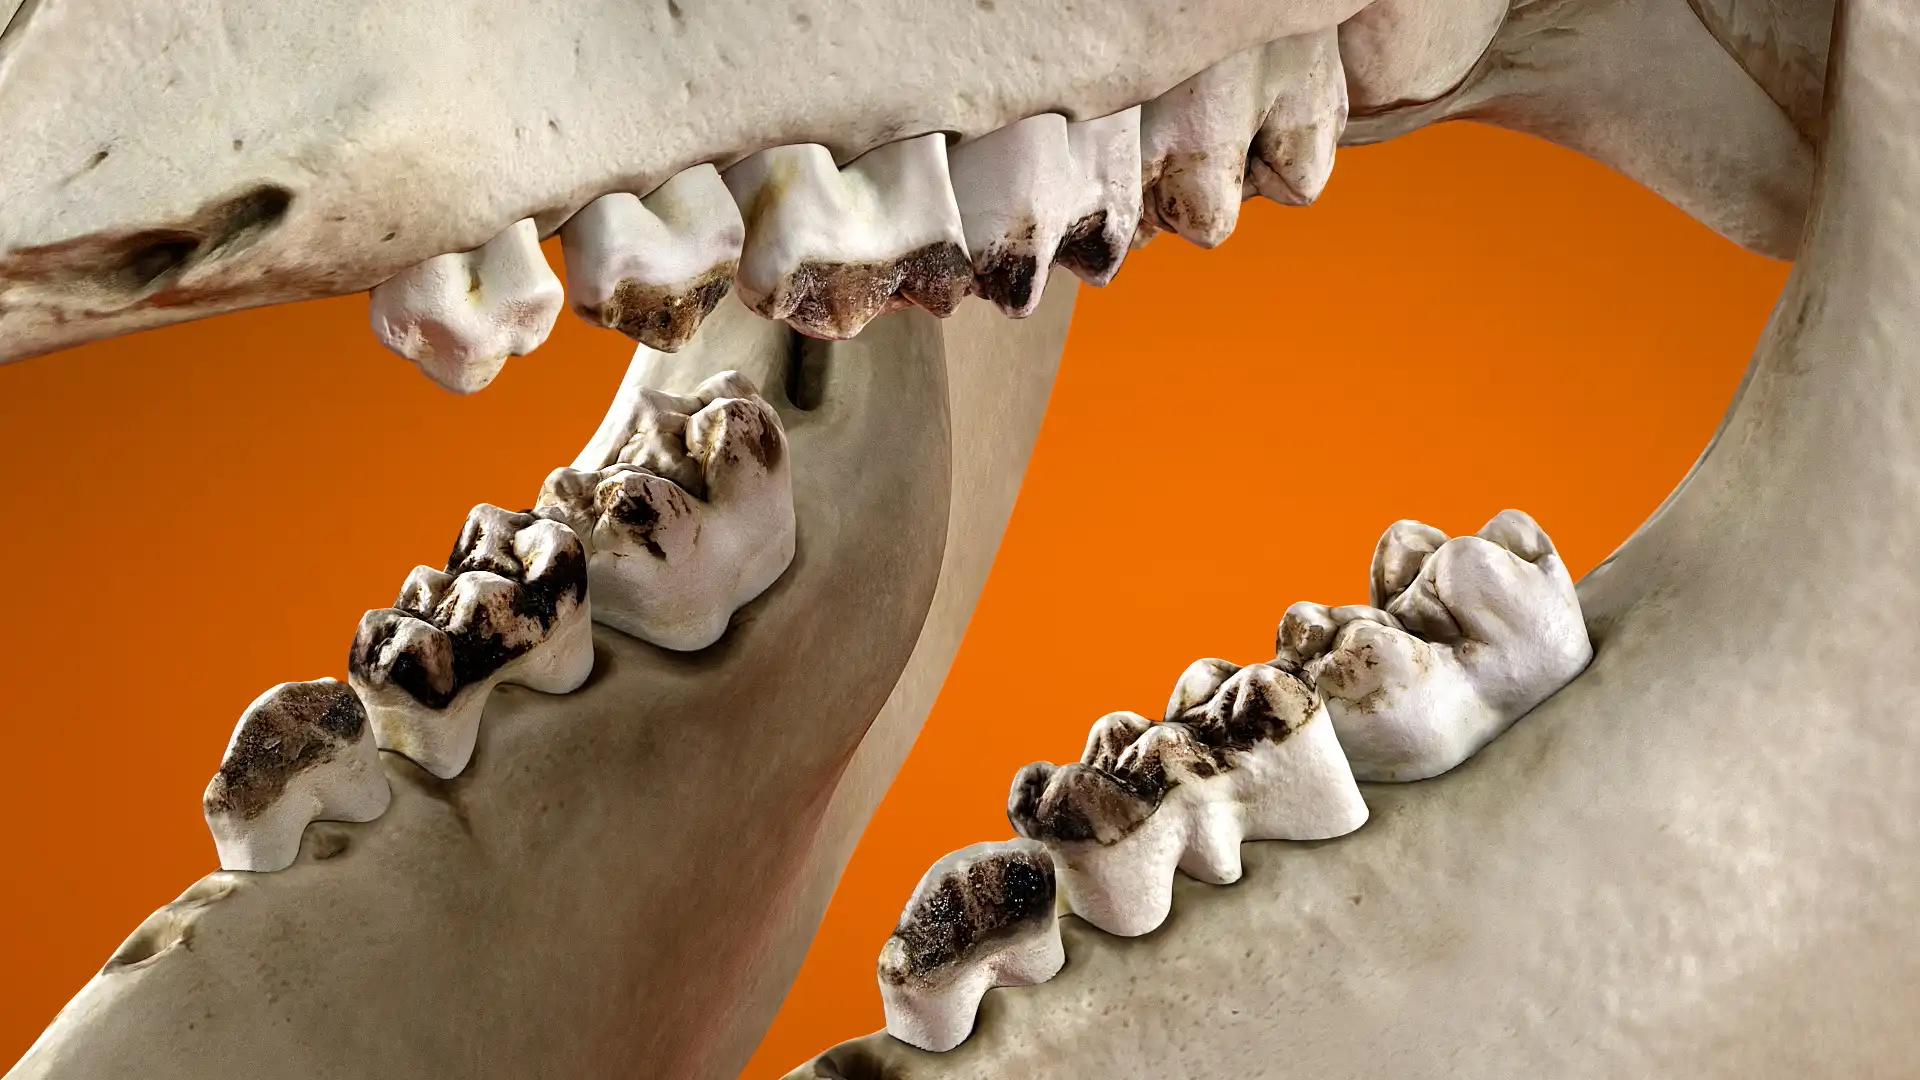
Ready for ultra close-up shots, as well as for use as a low-poly asset for a real-time engines. Suitable for scientific videos, including exploded views or animations of breaking into pieces.
Not all possible teeth are present, but this is literally the condition in which the real skull of a real pig was, so it is anatomically correct. For performance reasons, the 3D model is optimized compared to the original scan. In particular, the deep alveolar slots for the teeth in jawbone are closed to make model watertight.
Cameras, lighting or a studio environments are not provided.
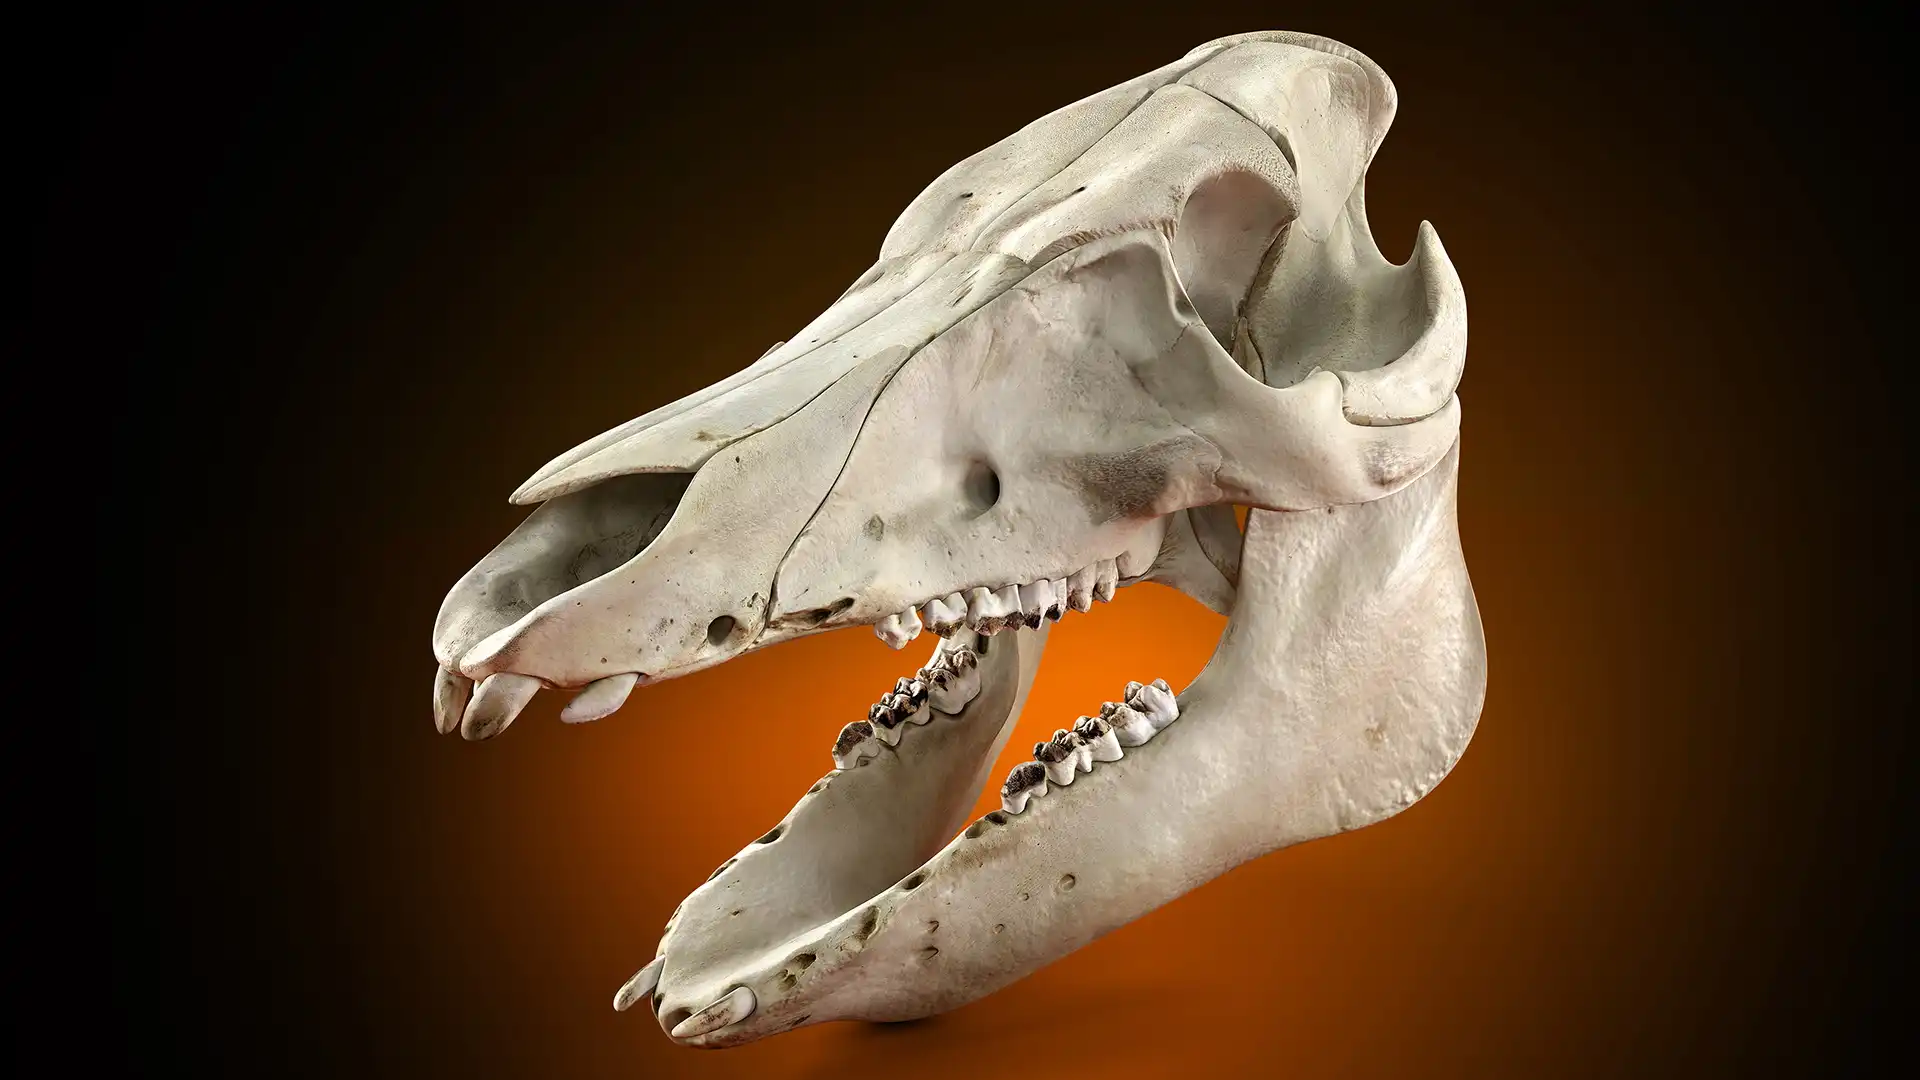
Presentation
All presentation images are rendered using 3ds Max 2017 and V-Ray 3.6.
Creation Process
A real skull of a real domestic pig was used to create this asset. We literally bought a pork head at the meat market. I'm not an expert in pigs, but I don't think it was a mature pig, just as this pig was no longer a piglet. Probably just the breed of medium or even small size.
So, we cooked it to make it easier to clean the bones from the soft tissues. We then cleaned each bone and tooth, dried them, and scanned each piece using photogrammetry.
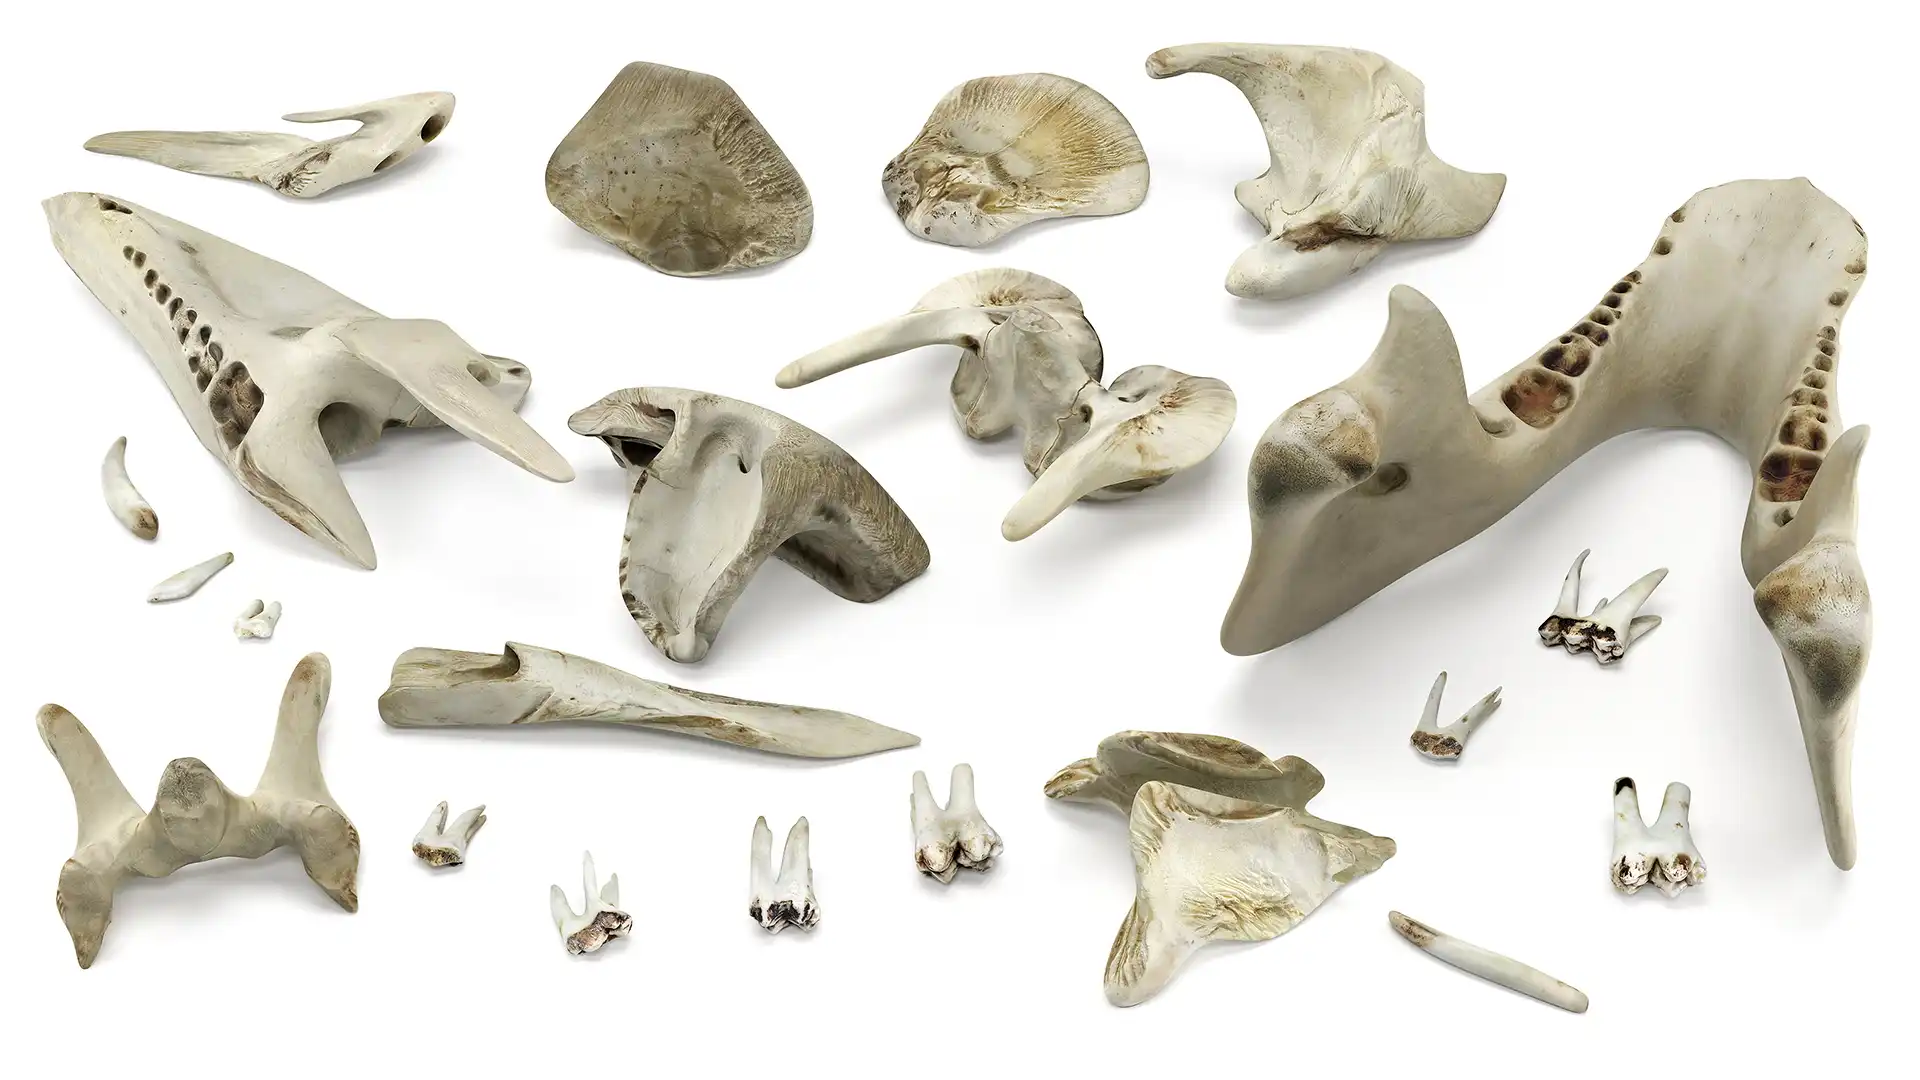
Below is a composition from photos of several randomly selected bones, so you can see an example of real material that we had to deal with.
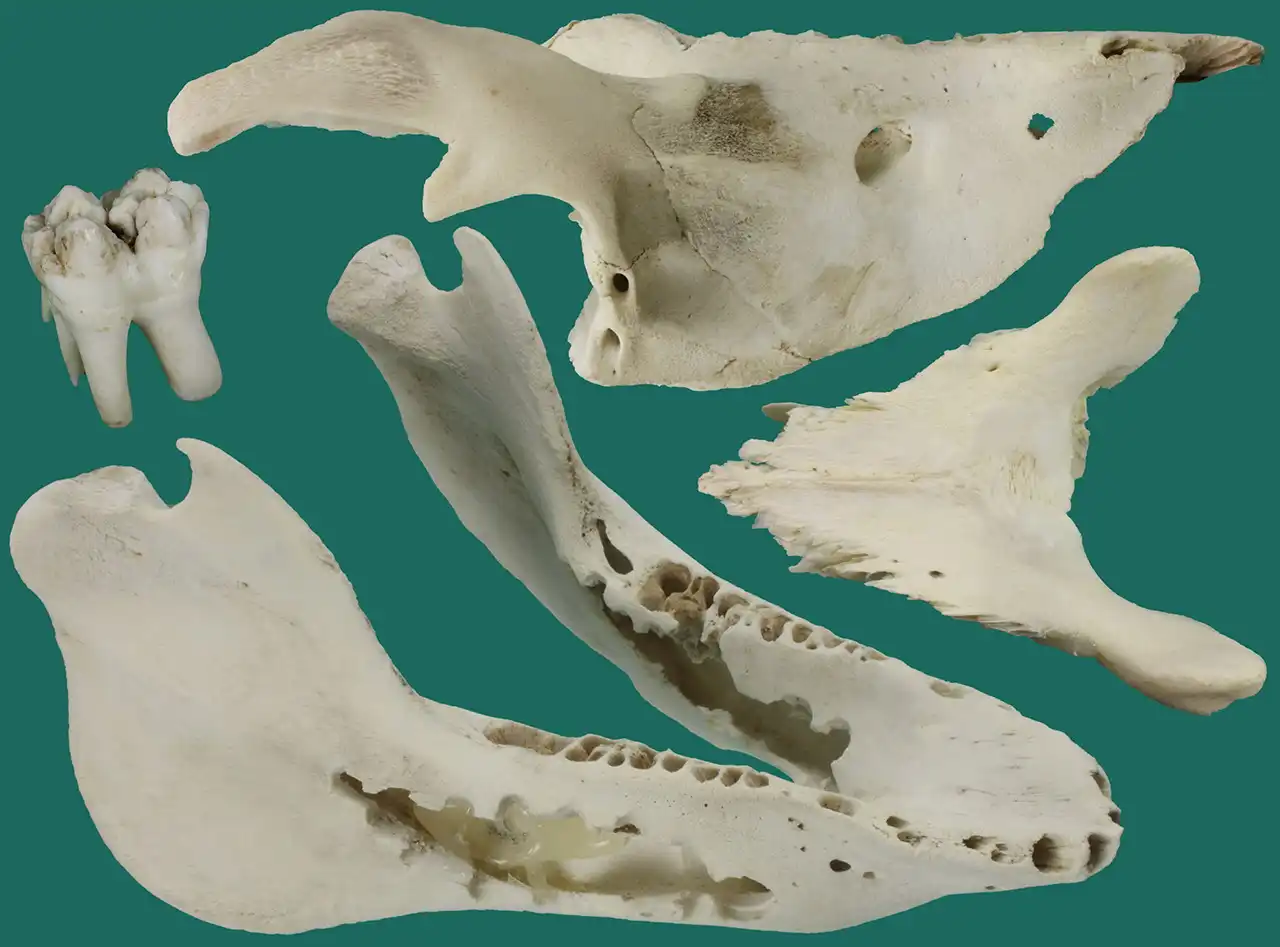
You probably think this is a very simple task. Like how to play with Lego cubes. Take the jaw, pull the teeth out and work with them. But in reality, the teeth just do not come out of the jaw. They are firmly ingrown in the jawbone and to pull them out, we had no choice but to break the jaw and open it on the sides. On the photo above you can clearly see exactly how the pig's jawbone was "modified". The removal of each tooth was a real challenge that we did not expect at first.
Another problem was the physical size of the parts. Again, the pig teeth were the smallest. So to scan them, we have to deal with macro photography. Not the easiest type of photography.
Used Software
In any case, hundreds of photographs of each bone were taken and transferred to a photogrammetry program. Personally, I use Metashape, but any, even completely free software will give you roughly similar results, however, it will take a little more effort.
When the scans were ready, I exported them as high-poly models to ZBrush for further cleaning from scanning flaws. The 3ds Max was used for retopology, V-Ray as the main rendering engine to creating presentation imagery for this asset.
As you may have guessed, I will not describe the whole process here, as this is a very complex topic that deserves its own huge tutorial. But I do want to mention that these processes (photo scanning, cleaning and retopology) took place in 2018 and consumed a lot of time. Since we were busy with other things that year, we just decided to freeze this project until better times. Now, in 2021, three years later, the auspicious times have finally come. In this year, I added another tool to my toolkit. And this is Blender. Starting with v2.9, it already has great built-in tools for both modeling and sculpting. When the tasks arise now, I will use definitely use Blender instead, to clean scans, topology crafting, and final projection of a fine details from high-polygon scans onto low-poly base mesh.
So if you plan to do such things, I strongly recommend comparing the tools before you start. Today, ZBrush is the most powerful software for sculpting, but certainly not the most convenient for casual use, as in this project, especially considering that ZBrush is paid and Blender is free.
Speaking of Blender. It was chosen as the second native format for this 3D asset due to its growing popularity. Honestly, this was my first case of commercial use of Blender, and I had the opportunity to compare my usual set of battle-tested tools, ie 3d industry leaders 3ds Max and V-Ray, with Blender and Cycles as a modern alternative.
So, everything was done in 3ds max and V-ray. The materials, lighting, visualization settings, and actual visualized images you can see above. To create a Blender version of this 3d asset, I decided to reproduce everything in Blender, ie the materials, as well as the full studio settings, to recreate conditions for Cycles as close as possible to those I already had in V-Ray.
If you want to learn more about converting 3ds Max scene to Blender, which was done for this 3D asset, welcome to the Cycles versus V-Ray, rendering engines brief comparison article!
Share
Please share if you like it!